Showing posts with label skirt. Show all posts

Friday, October 25, 2013

Make a Garment a Month My Garment for October

jeans skirt front


So here is my completed October garment for the AGAM sew along. I'm pleased with how my first attempt at this jeans skirt went but for the next one I am going to change some things up. First off is that extra long fly, I did go by the book for adding it but in none of my RTW jeans or skirts do I have a fly that long. Next up are the front pockets, I did draft them correctly and exactly how I wanted them but they are not usable . I forgot to take into account pocket depth, so while I can put something in them there is no guarantee that it will still be in there after a good walk, hey I'm still learning. I was also able to draft a shaped waistband and the fit is so much better.


jeans skirt back 2

The top that you can partly see is the muslin for my DIY Clothes basic shirt. I'm still working on it because of some many changes that I needed to make for it. Still even the final top won't be done for a while since I need to go notions shopping to get some much needed buttons.
Now time to start thinking about November's AGAM piece.

Until next time, happy sewing...


Wednesday, October 23, 2013

Sneak Peak October AGAM

Jeans skirt front


Jeans skirt back
Here is a sneak peak of my skirt so far. I’m still not done and haven’t posted in a while and wanted to update everyone. I hope to have the full reveal in the next couple of days.
Until next time, happy sewing…

Monday, October 14, 2013

A Garment A Month Project for October Is....


Fashion Pictures Courtesy of Pinterest

A denim/ jean style skirt again. I say again because last year I attempted this project and ended up with horrible results that left me scared for a few months. But I can't let one failure keep me from trying again. I just love skirts especially denim ones, they work so well in my line of work ( read: SAHM with a busy and wild bunch). And like jean pants they are easy, comfortable, fashionable and very versatile. Unlike last year I will work entirely from my own pattern or using my patternmaking books to help me instead of ready made patterns, so this will be completely self drafted so I know it will work.

For those of us that prefer ready made patterns here is a bit of denim skirt inspiration:


Vogue 8697


Butterick 5649


McCall's 5431


Independent pattern companies:

Colette Patterns Beignet


Hot Patterns P&S Slouchy Fly Front Skirt


Grainline Studio Moss Skirt


Until next time, happy sewing...


Monday, July 22, 2013

Basic Skirt Variation 2: Rosie Skirt


After my last skirt I was ready to jump on this one hoping it would be a much better experience, and this one did not disappoint. I did have a couple of bumps but nothing like my last skirt. So the second variation on the basic skirt is called the Rosie. 

Description from DIY Clothes "This one's a sturdy little workwear-inspired number with a center front seam, a waistband, big patch pockets, and some sassy little side slits at the hem."


I kept the skirt pretty much the same, instead of shortening it though I kept it the same length and still did the side slits. So I was able to follow most of the directions given in DIY Clothes. I did the patch pockets according to the book's directions, I already had a waistband so that I did not need to draft that. I did not shorten my pattern but I did add a mark to the side seam to let me know where to stop sewing for the side slits. For the button placket I did originally follow Cal's suggestion of no more than 5 inches long but for me that was too short. I was not able to pull the skirt up over my hips with such a small opening. So took out the placket and undid part of the side seam until I was able to get it over my hips. It turns out I needed 7 inches and I had just enough space since my pocket opening starts at that point.
I also kept my welt pocket from the basic skirt pattern.


Sewing up the skirt was pretty much a breeze including the topstitching. But hen it came to the buttonholes that's where I ran into problems as you can see. I used the same needle for the buttonholes that I used for the topstitching, since I was using buttonhole twist for both. This turned out to be a problem, the needle turned out to be too small to handle the thick thread and zigzag stitching together. This gave me a nest of fabric for my first attempt and once I got the thread out it left a very visable mar on the side of my skirt. I'm not going to worry about it too much since I wear my tops out. If it starts to become a problem I may try to add some fusible interfacing to the wrong side to try and strengthen the area a bit.


Quick Info:

  • Mid to heavy weight twill 
  • Self drafted pattern using Design-It Yourself Clothes
  • 5 pattern pieces (front, back, waistband, pocket, button tab)
  • A-line skirt with front patch pockets and side button closing
  • Double turned hem with side vents

A little side note, the top that is pictured with all of the skirts is BurdaStyle Magazine 02-2009-108, I made it the summer of 2009, never reviewed it (not sure why) but it's one of my favorite t-shirt patterns.
Until next time, happy sewing...


Friday, July 19, 2013

Basic Skirt Variation 1: Laura Skirt


This is the second project in DIY Clothes, a variation on the basic skirt. I headed into this one with much enthusiasum, but that quickly died. The patternmaking changes were quite easy to do , so that took me all of one session to do. I followed the insturctions as much as I could but I also incorporated my design change. Instead of a straight maxi skirt with a ruffle on the bottom I went for a hi-low hem., its not too exagerated like a mullet dress but it can be seen from the side. So creating my hem line was the only thing I did different from the book.

For my fabric I used a silver pinstripe suiting I had laying around. It was one of  those"what in the world was I thinking" purchases a few years ago. I did go looking for a more wearable print for myself but could not find anything, so I just went with this one. I did end up being low on fabric but I was able to compromise and cut the front facing with a seam instead of on the fold like it should have been, no biggie there.


Construction time, all is going well until it is time for the ruffle. Little did I know how much this fabric raveled, I only had a 1/2 seam allowance so the gathering stitches are not that far from the edge. I was just praying that I could get all of it gathered before the raveling got to the stitches. This took me a while as a matter of fact it was so nerve wrecking I just would not touch it for few days. In some places it did mange to unravel right up to the stitches but I was able to sew it on without much problem. But that was not the worst of it. After I got the ruffle sewn on I then proceed to finish the seam with my serger, after I was I done I noticed that the bottom was not sitting right. I had sergered and cut part of the skirt with the seam right in the lower center back. I was one of those " pick your mouth up off the floor" moments. I couldn't believe it, at that point I started to just pitch it in trash after what I just went through with the ruffle. But I decided to just push through whatever it was and not give up so easily.

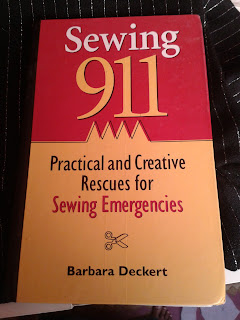
So I pull out Sewing 911 to get and idea of how to fix it and what it gave was almost exactly what I was thinking to do. Just interface the torn section pin together and sew as tiny of a seam as you can similar to a waist dart and press. For my skirt this was a little be more tricker since if I wanted to hide it I had to match the stripes. After about a half hour worth of work I was done. So time to finish my skirt or so I thought.
I had put in a centered zipper in the side seam and I was finishing up the facing when I trimmed the top of the zipper tape to make it sit better under the facing. Just a few more stitches and I done, I pull on the zipper to check and make sure the side seam is even at the top before I finish sewing on the facing at the end and up and off the zipper pull went. It was like a Twilight Zone moment, I couldn't believe that just happened, I just stood there for a few seconds mouth wide open. It took me a minute but  I just sucked it up unpicked the zipper and added an invisible like the DIY Clothes suggested.


I was so glad to be done with this project, it just gave me the blues. Because of what I went through I'm not even sure if its going to see the light of day. Every time I look at it all those memories come flowing back and I just try to get it out of my site. I guess time will tell.

Quick Info:
  • Self drafted pattern using Design-It-Yourself Clothes by Cal Patch
  • 8 Pattern pieces (front yoke, front yoke facing, back yoke, back yoke facing, skirt front, skirt back, front ruffle, back ruffle)
  • Black poly suiting with a silver pinstripe
  • Side seam invisible zipper
  • Double turned hem 
  • Hi-low hem line


Until next time, happy sewing...

Wednesday, July 17, 2013

Burda 8765 Level 2 Garment

This is my level 2 garment for the YCMI program that I am blogging about on my other blog. As much as I love wearing skirts I don't normally go after straight skirts. Even though I had recently made the popular McCall's 3830 it doesn't get pulled out of the closet that much to be worn, but since I needed a skirt with a back slit or vent for this project and I am trying to stick as close as I can to the requirements for each level I really didn't have much of  a choice. But I am so glad I did it actually looks better no me than I thought. I don't know if the fit is better or what but I like how this one looks on me. I do know that I like waistbands better than a faced waist in all of my bottoms. This pattern doesn't have a shaped waistband that I prefer but I think I can swap it Burda magazine waistband that is shaped.

When I bought the fabric I was just looking for something to fit the requirements of the program, had I known how much I ended up liking this pattern I think I would have a picked a different print or at the least one for the program and one to wear. This one will only see the inside of the house.

 I was a little surprised to find that there were no reviews for this pattern since it such a basic wardrobe piece.  While I don't think I'll be sewing up a closet full of these I do think its worth keeping around to sew up here and there.

Quick info:
  • the fabric is a mid-weight denim with gold glitter and burgundy flowers
  • I added 3 inches to the length to make it a maxi
  • Burda 8765 is a straight skirt, non-shaped waistband, back a back vent
  • Only 3 pieces (front, back and waistband)
  • center back centered zipper 
  • No lining
  • I did stray from the program and did a double turn hem instead of using the hem tape


Until next time, happy sewing...


Follow my blog with Bloglovin

Sunday, July 14, 2013

Basic Skirt (A-Line)


I have drafted this skirt so many times that I should know it by heart by now but I don't. The first few times was okay but not perfect. So worked on it some more, I eventually got a draft that I was pretty pleased with that I made it 
a few times but still not perfect. So then I turned to Building Patterns and drafted the skirt sloper and was a bit more pleased with the fit after the first draft. So I decided to mix the two drafts and went from there. It was actually quite easy to do. I use DIY Clothes for the basic outline and Building Patterns for the waist and hip fit this also gave the back a center back seam for a better fit. I only needed to make two muslins and I was done. And let me tell you this is best fitting skirt I have ever had, I can't wait to fill my closet with a bunch of these. I just need to trace off a working copy and put the original away for safe keeping.

I did change a little bit from the book little, the book gives you directions for a rectangular shaped waistband for the basic skirt if you want that option but it doesn't show the skirt with it. Also the basic skirt has front patch pockets which I did not like so I went with back welt pockets instead. To find the best placement for me, I just cut out a a rectangle of paper added tape and when I was finish fitting the muslin I just stuck and restuck the paper on the muslin until I was pleased with its placement and then just transfer onto the paper pattern.


The only thing that needs a bit more work to me is the waistband. I used the instructions from Design-It-Yourself Clothes but its just a rectangular waistband and on me the waistband actually stands away from my body. So now I have to figure out how to draft a shaped waistband. In doing a quick look through of all of my patternmaking books it seems as though only Building Patterns has instructions for this which is not good. I like to look at more than one way at doing something so that I can have and idea of what I'm doing   since I like to experiment sometimes. I guess its going to be online tutorials if I can find any.
Quick Info:
  • Self drafted pattern using both Design-It-Yourself Clothes and Building Patterns
  • Fabric is a lightweight cotton 
  • 3 pattern pieces (front, back and waistband)
  • A-line skirt with a non-shaped waistband
  • Has a side lapped zipper and hook and eye closing
  • Double turned hem


Until next time, happy sewing...


LinkWithin

Related Posts with Thumbnails