This is the second project in DIY Clothes, a variation on the basic skirt. I headed into this one with much enthusiasum, but that quickly died. The patternmaking changes were quite easy to do , so that took me all of one session to do. I followed the insturctions as much as I could but I also incorporated my design change. Instead of a straight maxi skirt with a ruffle on the bottom I went for a hi-low hem., its not too exagerated like a mullet dress but it can be seen from the side. So creating my hem line was the only thing I did different from the book.
For my fabric I used a silver pinstripe suiting I had laying around. It was one of those"what in the world was I thinking" purchases a few years ago. I did go looking for a more wearable print for myself but could not find anything, so I just went with this one. I did end up being low on fabric but I was able to compromise and cut the front facing with a seam instead of on the fold like it should have been, no biggie there.

Construction time, all is going well until it is time for the ruffle. Little did I know how much this fabric raveled, I only had a 1/2 seam allowance so the gathering stitches are not that far from the edge. I was just praying that I could get all of it gathered before the raveling got to the stitches. This took me a while as a matter of fact it was so nerve wrecking I just would not touch it for few days. In some places it did mange to unravel right up to the stitches but I was able to sew it on without much problem. But that was not the worst of it. After I got the ruffle sewn on I then proceed to finish the seam with my serger, after I was I done I noticed that the bottom was not sitting right. I had sergered and cut part of the skirt with the seam right in the lower center back. I was one of those " pick your mouth up off the floor" moments. I couldn't believe it, at that point I started to just pitch it in trash after what I just went through with the ruffle. But I decided to just push through whatever it was and not give up so easily.

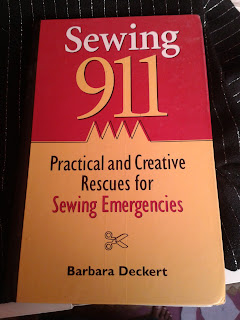
So I pull out Sewing 911 to get and idea of how to fix it and what it gave was almost exactly what I was thinking to do. Just interface the torn section pin together and sew as tiny of a seam as you can similar to a waist dart and press. For my skirt this was a little be more tricker since if I wanted to hide it I had to match the stripes. After about a half hour worth of work I was done. So time to finish my skirt or so I thought.

I had put in a centered zipper in the side seam and I was finishing up the facing when I trimmed the top of the zipper tape to make it sit better under the facing. Just a few more stitches and I done, I pull on the zipper to check and make sure the side seam is even at the top before I finish sewing on the facing at the end and up and off the zipper pull went. It was like a Twilight Zone moment, I couldn't believe that just happened, I just stood there for a few seconds mouth wide open. It took me a minute but I just sucked it up unpicked the zipper and added an invisible like the
DIY Clothes suggested.
I was so glad to be done with this project, it just gave me the blues. Because of what I went through I'm not even sure if its going to see the light of day. Every time I look at it all those memories come flowing back and I just try to get it out of my site. I guess time will tell.
Quick Info:
- Self drafted pattern using Design-It-Yourself Clothes by Cal Patch
- 8 Pattern pieces (front yoke, front yoke facing, back yoke, back yoke facing, skirt front, skirt back, front ruffle, back ruffle)
- Black poly suiting with a silver pinstripe
- Side seam invisible zipper
- Double turned hem
- Hi-low hem line
Until next time, happy sewing...